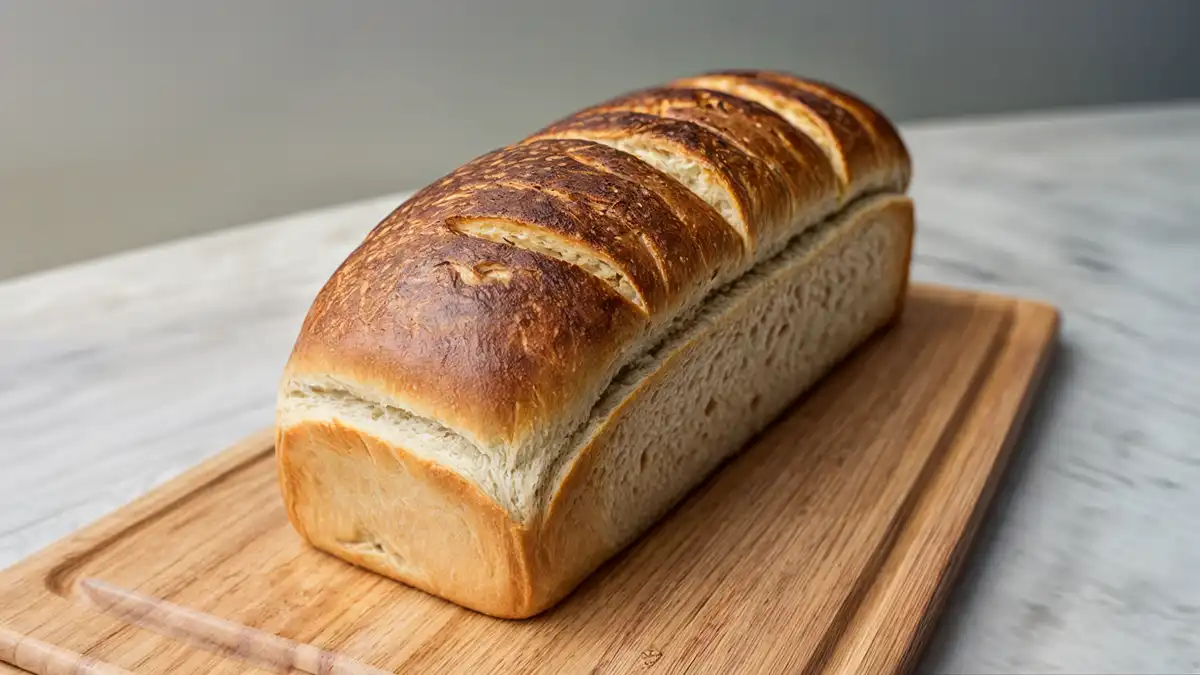
Welcome to your new favorite kitchen adventure—mastering the sandwich sourdough bread recipe! There’s something almost magical about the process of turning simple ingredients like flour, water, and salt into a loaf of bread that boasts a crispy crust and a tender, airy interior. Sourdough isn’t just another bread; it’s an age-old tradition that marries science with art, resulting in flavors and textures that commercial breads can hardly match. Whether you’re a seasoned baker or a novice ready to dive into your first batch of homemade bread, this guide will walk you through creating the perfect sourdough sandwich loaf.
Table of Contents
| Section | Content |
|---|---|
| Introduction | An engaging overview of sourdough sandwich bread, its benefits, and a comparison table of different recipes. |
| Essential Ingredients | Detailed list of core ingredients, possible substitutions, and adaptations for different dietary needs. |
| Step-by-Step Guide | Comprehensive instructions on mixing, fermenting, shaping, proofing, and baking your sourdough bread, with a tutorial video. |
| Nutritional Information | Insight into the health benefits and nutritional profile of sourdough bread, including a comparison with regular bread. |
| Storing and Preserving | Best practices for storing and freezing sourdough bread to maintain its freshness and flavor. |
| FAQs | Answers to common questions about using, cutting, and improving sourdough sandwich bread. |
Why Choose Sourdough for Your Sandwich Bread?
Sourdough bread isn’t just delicious—it’s also healthier and more digestible than many other types of bread. Thanks to the natural fermentation process, sourdough boasts a lower glycemic index and is often tolerated better by those who are sensitive to gluten. Not to mention, the tangy flavor of sourdough adds an extra layer of taste to any sandwich you craft, from a classic turkey and cheese to an avant-garde, gourmet combination.
Table: Comparison of Two Popular Sourdough Sandwich Bread Recipes
| Feature | Classic Sourdough Recipe | Modern Twist Sourdough Recipe |
|---|---|---|
| Prep Time | 12 hours | 16 hours |
| Cook Time | 50 minutes | 35 minutes |
| Total Time | 12 hours 50 mins | 16 hours 35 mins |
| Yield | 1 loaf | 2 loaves |
As you can see, while both recipes require a significant time commitment, the results are well worth it. This table highlights the key differences in preparation and yield, helping you decide which recipe might fit your schedule and needs better.
Essential Ingredients for Sandwich Sourdough Bread Recipe
When it comes to baking the perfect sourdough sandwich bread, selecting the right ingredients is key to achieving that heavenly taste and ideal texture. Here’s a breakdown of the core ingredients you’ll need, along with some smart substitutions to cater to different dietary needs or pantry limitations.
Core Ingredients for a Basic Sourdough Loaf
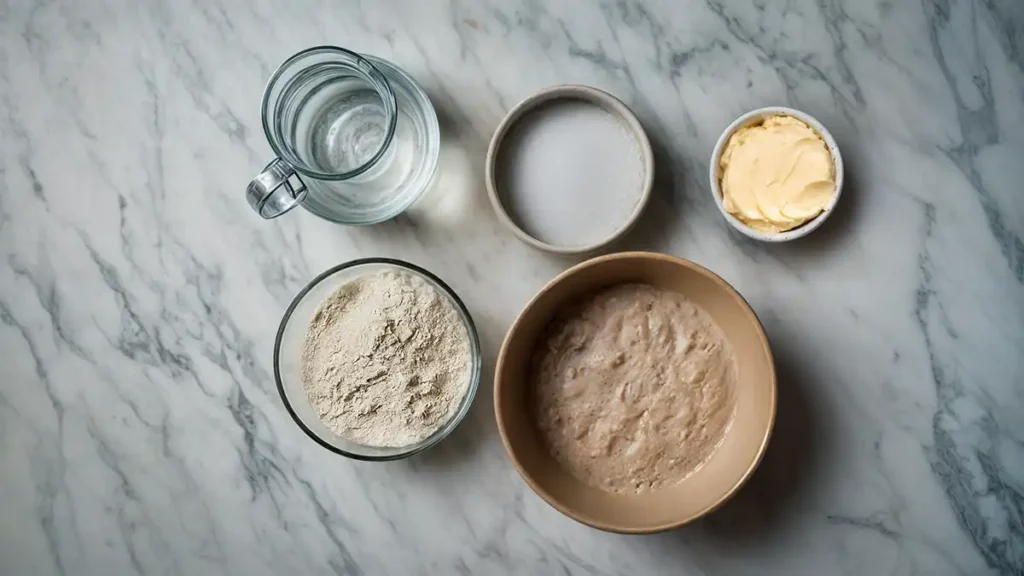
A great sourdough starts with simplicity. Here are the must-have ingredients:
- Flour: Bread flour is preferred for its higher protein content, which helps develop a strong gluten network for a loftier loaf.
- Water: Lukewarm water activates the starter more effectively, aiding the fermentation process.
- Sourdough Starter: This is the heart of the flavor and texture of your bread. A well-maintained, bubbly starter brings the bread to life.
- Salt: Enhances flavor and regulates yeast activity.
Substitutions to Spice Up Your Loaf
Not everyone’s pantry looks the same, and sometimes you’ve got to get a little creative. Here’s how you can swap ingredients without compromising on deliciousness:
- Flour Alternatives: For those looking to add a nutritional punch or cater to dietary restrictions, half whole wheat and half bread flour can be used. This mixture maintains a light texture while adding a wholesome flavor.
- Vegan Options: Plant-based diets can substitute traditional ingredients with vegan-friendly options. For instance, use vegan butter to help soften the dough.
Adapting to Allergies and Intolerances
For those dealing with allergies, here are a few quick tips:
- Gluten-Free: While traditional sourdough relies on gluten, innovative gluten-free flours mixed with xanthan gum can offer a similar texture.
- Dairy-Free: Swap out butter for olive oil or a dairy-free margarine to keep the dough rich and tender.
Step-by-Step Guide to Baking Sandwich Sourdough Bread Recipe
Mastering the art of sourdough bread making is a rewarding endeavor that combines patience with a touch of culinary science. This step-by-step guide will walk you through the entire process, from mixing your dough to pulling a beautiful loaf out of the oven.
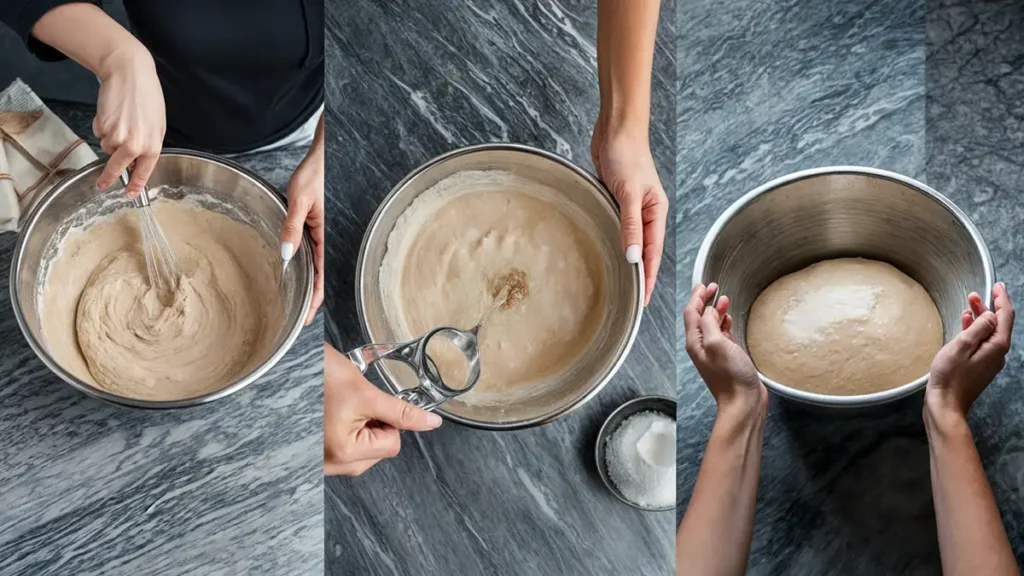
Mixing and First Fermentation
- Prepare Your Starter: Ensure your sourdough starter is active and bubbly. If it’s been in the fridge, feed it a few times at room temperature to revive it.
- Mix Ingredients: Combine flour, water, sourdough starter, and salt in a large mixing bowl. Mix until all ingredients are incorporated and you have a shaggy, sticky dough.
- Bulk Fermentation: Allow the dough to rise at room temperature. This process, which can take anywhere from 4 to 12 hours depending on the temperature and vigor of your starter, is crucial for flavor development and texture.
Shaping and Proofing the Dough
- Turn and Fold: During the first few hours of fermentation, perform a series of stretches and folds every 30 minutes to strengthen the gluten network.
- Shape the Dough: Once the dough has doubled in size and is full of airy bubbles, turn it out onto a lightly floured surface. Shape it into a tight loaf to fit your baking vessel—a loaf pan is ideal for sandwich bread.
- Second Rise: Place the shaped dough into a well-greased loaf pan. Let it rise until it just starts to dome over the rim of the pan, which could take another 2 to 4 hours.
Baking Your Sourdough Bread
- Preheat Your Oven: Heat your oven to 450°F (232°C). If you have a baking stone, place it in the oven to heat as well.
- Score the Dough: Just before baking, make a shallow cut along the top of your dough to help it expand in the oven.
- Steam for Crust Development: Add a pan of hot water to the oven to create steam, which helps produce a crispy crust.
- Bake: Place the loaf pan in the oven and bake for about 30 to 40 minutes, until the crust is deeply browned and the loaf sounds hollow when tapped.
Cooling and Serving
Allow your bread to cool on a rack for at least an hour before slicing. This waiting period sets the crumb and improves the texture of your bread, making it easier to slice.
If you’re interested in pairing your freshly baked sourdough with a delicious and unique main dish, consider exploring this crab brûlée recipe. It’s a luxurious dish that would complement the robust flavors of your homemade bread beautifully.
Watch How To Make Sandwich Sourdough Bread Recipe
For visual learners, here’s a tutorial video showing the discussed techniques. Watching a pro walk through the steps can offer extra tips and insights to boost your bread-making skills.
Nutritional Information of Sandwich Sourdough Bread Recipe
Understanding the nutritional profile of your homemade sourdough sandwich bread can help you make informed decisions about your diet. Sourdough bread, celebrated for its distinct tangy flavor and chewy texture, also offers numerous health benefits. Here’s a breakdown of what you can expect from your loaf.
Health Benefits of Sandwich Sourdough Bread Recipe
- Easier Digestion: The natural fermentation process of sourdough bread breaks down gluten to some extent, making it easier to digest for some people who are sensitive to gluten.
- Lower Glycemic Index: Sourdough bread has a lower glycemic index compared to regular bread. This means it can help regulate blood sugar levels better.
- Nutrient Absorption: The fermentation process increases the availability of nutrients like magnesium, iron, and zinc.
Comparative Nutritional Content
Here’s a typical nutritional profile for one slice (about 60 grams) of sourdough sandwich bread:
| Nutrient | Amount per Slice |
|---|---|
| Calories | 160 |
| Total Fat | 1g |
| Sodium | 400mg |
| Total Carbohydrate | 32g |
| Dietary Fiber | 2g |
| Sugars | 1g |
| Protein | 6g |
Nutritional Comparison with Regular Bread
| Nutrient | Sourdough Bread | Regular White Bread |
|---|---|---|
| Calories | 160 | 170 |
| Total Fat | 1g | 2g |
| Sodium | 400mg | 230mg |
| Total Carbohydrate | 32g | 33g |
| Dietary Fiber | 2g | 1g |
| Sugars | 1g | 3g |
| Protein | 6g | 4g |
Benefits of Whole Grains
For those who prefer a whole grain option, sourdough made with whole grain flour can offer even more benefits:
- Higher Fiber Content: Whole grain flours retain the bran and germ, resulting in higher fiber content.
- Additional Nutrients: Whole grains provide more vitamins and minerals compared to refined flours.
Why Choose Sourdough Over Other Breads?
The unique fermentation process not only enhances flavor but also increases the bread’s nutritional value. For more detailed insights into the health benefits of whole grains, check out this article from Harvard T.H. Chan School of Public Health.
Storing and Preserving Your Sourdough Sandwich Bread

Keeping your sourdough sandwich bread fresh is essential to enjoying its full flavor and texture. Proper storage techniques can extend the bread’s shelf life and ensure that each slice remains as delicious as the first. Here’s how to store and preserve your sourdough bread effectively.
Best Practices for Storing Sourdough Bread
- Room Temperature Storage: Sourdough bread is best stored at room temperature in a bread box or a paper bag. This allows the bread to breathe, preventing the crust from becoming soggy. Avoid plastic bags as they can trap moisture and lead to mold growth.
- Freezing for Long-Term Storage: If you want to keep your bread for an extended period, freezing is the way to go. Slice the bread before freezing so you can easily take out just what you need. Wrap the slices in parchment paper and place them in a ziplock bag or an airtight container.
Freezing and Thawing Tips
- Wrapping: Wrap your bread tightly in plastic wrap, then in aluminum foil before placing it in the freezer. This double-layer method prevents freezer burn and maintains the bread’s moisture.
- Thawing: To thaw, simply leave the bread at room temperature for a few hours. For a quick thaw, place the slices directly in a toaster or a warm oven for a few minutes.
Revivifying Day-Old Bread
If your sourdough bread starts to lose its freshness, you can revive it with a simple trick:
- Spritz with Water: Lightly spritz the loaf with water.
- Bake: Place it in a preheated oven at 350°F (175°C) for about 10 minutes. This refreshes the crust and makes it taste almost like freshly baked.
Table: Storage Methods and Their Benefits
| Storage Method | Benefits |
|---|---|
| Room Temperature | Best for short-term storage; keeps crust crispy |
| Freezing | Ideal for long-term storage; retains freshness and flavor |
| Revivifying | Restores texture and taste of day-old bread |
Avoiding Common Storage Mistakes
- Plastic Bags: While convenient, plastic bags trap moisture, which can lead to mold. Use them only for short-term storage if you must.
- Refrigeration: Avoid storing sourdough in the refrigerator. The cold environment accelerates staling and dries out the bread.
Improving Your Bread Experience
Pairing your sourdough bread with delicious recipes can elevate your meal experience. Try serving your bread with hearty dishes like porcupine meatballs with mushroom soup or enjoy it alongside a comforting bowl of porcupine soup. These combinations highlight the versatility and rich flavor of sourdough bread.
FAQs About Sandwich Sourdough Bread Recipe
Is Sourdough Bread Good for Sandwiches?
Absolutely! Sourdough bread is an excellent choice for sandwiches because of its robust texture and rich flavor. The tangy taste of sourdough complements a variety of fillings, from savory meats and cheeses to fresh vegetables and spreads. Its sturdy structure also holds up well to moist ingredients without getting soggy, making it perfect for hearty sandwiches.
What Tastes Good with Sourdough Bread?
Sourdough bread pairs wonderfully with a wide range of flavors. Here are a few ideas:
- Savory Options: Roast beef, turkey, ham, and cheese (like cheddar or Swiss) make great sandwich fillings. Add condiments like mustard, mayo, or aioli for extra flavor.
- Vegetarian Delights: Fresh avocado, tomatoes, cucumbers, and sprouts create a refreshing, crunchy sandwich. Hummus or pesto can add a delicious twist.
- Sweet Pairings: For a sweet and savory combination, try sourdough with jam, honey, or a raspberry chipotle sauce. These spreads enhance the natural tanginess of the bread.
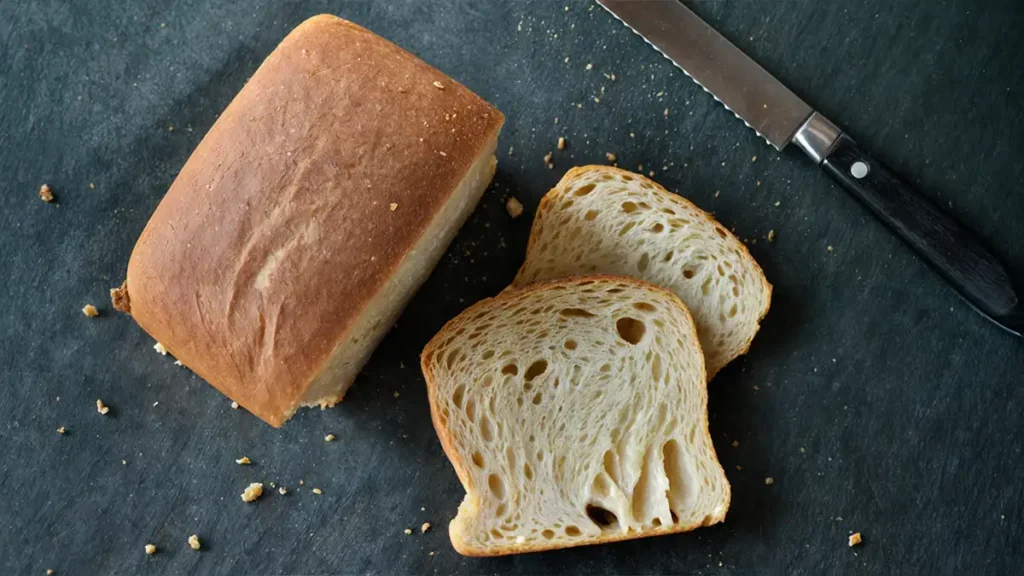
How Do You Cut Sourdough for a Sandwich?
Cutting sourdough bread for sandwiches is easy if you follow these steps:
- Use a Bread Knife: A serrated bread knife is essential for slicing through the crust without crushing the loaf.
- Stabilize the Loaf: Place the bread on a cutting board and hold it steady with one hand.
- Slice Evenly: Cut straight down with a sawing motion, aiming for slices about 1/2 inch thick. This thickness provides a good balance between sturdiness and ease of biting.
How to Make Sourdough Sandwich Bread Less Dense?
If your sourdough sandwich bread turns out too dense, try these tips to achieve a lighter loaf:
- Increase Hydration: Adding a bit more water to your dough can help create a lighter texture. Aim for a slightly sticky dough before the first rise.
- Proper Kneading: Ensure you knead the dough enough to develop the gluten. This can take about 10-15 minutes by hand or 5-10 minutes in a stand mixer.
- Longer Fermentation: Allowing the dough to ferment longer can improve its structure and make it less dense. A longer, slower rise gives the yeast more time to create air pockets.
- Active Starter: Make sure your sourdough starter is very active and bubbly before using it. An underactive starter can result in denser bread.
Conclusion
We hope this guide has provided you with everything you need to bake the perfect sourdough sandwich bread. From understanding the nutritional benefits to mastering the baking process and customizing your loaf, you are now equipped to create delicious and healthy bread at home.
Thank you for reading! If you have any questions or want to share your own sourdough experiences, please leave a comment below. Happy baking!